Blog

  • How to Get Glass Skin Naturally: Step-by-Step Korean Routine

    How to Get Glass Skin Naturally: Step-by-Step Korean Routine

    I used to scroll through social media feeling envy at those dewy, almost crystal-clear complexions. Glass skin – that luminous, translucent glow – felt like a distant dream. But I’ve learned it’s not about filters or luck. It’s about hydration, consistency, and good habits, no matter your skin type. You deserve skin that looks healthy and glassy, and with the right routine, you can get there too! Trust me, I’ve seen the transformation myself. Glass skin isn’t a fantasy; it’s a reflection of healthy, well-cared-for skin.

    What Is Glass Skin?

    Glass skin is a Korean beauty ideal of skin so smooth, clear, and hydrated that it practically glows from within. Imagine skin that looks “crystal-clear, poreless, and luminous – like a piece of glass” That’s the “glass” effect. Experts describe it as a complexion that is ultra-smooth, even, and intensely hydrated, with a soft shine. In Korea, this kind of radiant skin symbolizes health and youth. It comes from layering lots of gentle, water-based products that lock in moisture and protect the skin barrier.

    What it’s not: Glass skin isn’t about having zero pores or looking airbrushed. As dermatologist Amy Wechsler reminds us, true filter-like skin “doesn’t exist” – but healthy, clear, radiant skin is achievable. Even if you have acne, sensitivity, or any tone, you can aim for that hydrated glow. It’s really about caring for your skin consistently, not chasing perfection.

    Common Myths and Mistakes

    It’s easy to fall for myths. One big myth is that you need 10 different steps or crazy products to look dewy. The truth? Simplicity and gentle care go further. A common mistake is over-exfoliating or using harsh products: peeling away every little flaw won’t speed up glow – it can actually damage your skin barrier. Another trap is skipping sunscreen. Dermatologists emphasize daily SPF as non-negotiable for any glow routine .Without sun protection, UV rays will undo all your hard work by dulling skin and causing premature aging.

    Check out this quick video to learn what not to do if you want glowing, glass-like skin.

    Some people think glass skin is only for lucky young folks or that you must use heavy makeup. Nope. It’s about treating your skin well – drinking enough water, sleeping well, and following a gentle routine. In fact, experts note that even someone with breakouts can work toward this glow by nourishing their skin inside and out (get enough sleep, hydration, and a balanced diet. Finally, don’t expect overnight magic. Glass skin is a goal, not an instant filter. Focus on small changes and consistency, and you’ll be surprised by the healthy glow that comes in time.

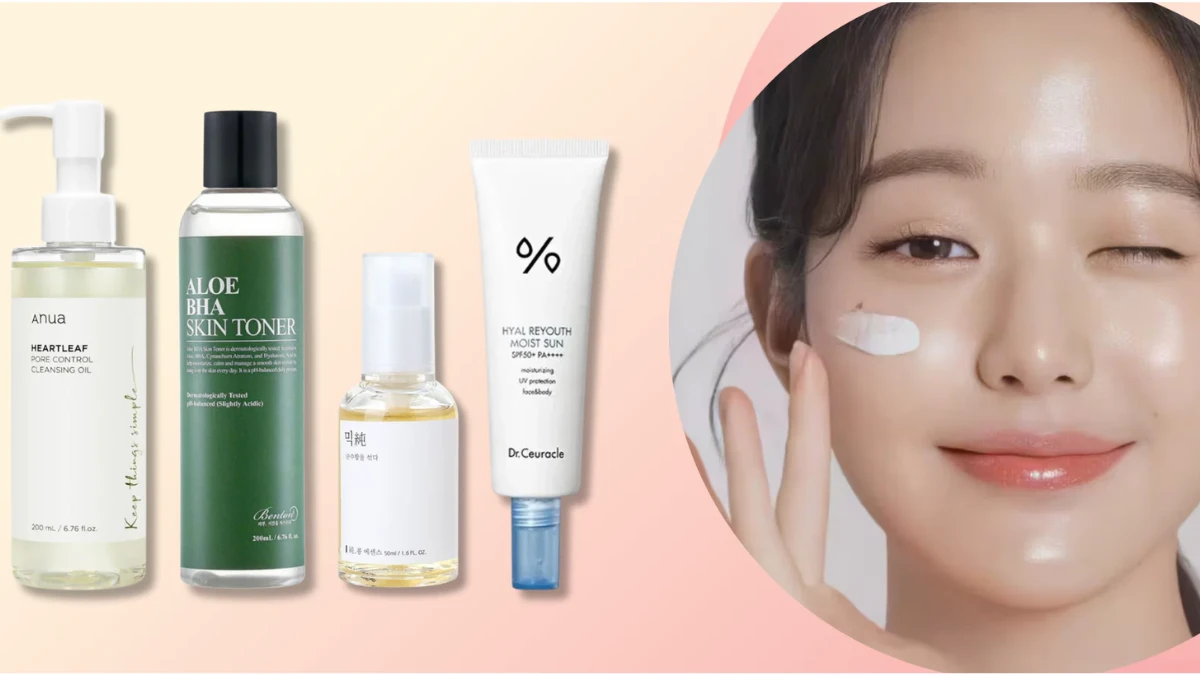
    Step-by-Step Korean Skincare Routine for Glass Skin

    Let’s break down the heart of the glass skin routine. Each step is short and sweet, so stick to them day and night (some are morning-only). I recommend following these in order – you’ll layer products from lightest to heaviest. Feel free to adjust for your skin’s needs (for example, skip exfoliation on super-sensitive days, or use an extra hydrating mask if you’re dry). But remember: consistency is key.

    1. Oil Cleanse (Double Cleanse): Begin with a gentle oil-based cleanser or balm. I massage it into dry skin to melt away makeup, sunscreen and excess oil. This first cleanse lifts away the day’s grime without stripping moisture. Then rinse and follow with a water-based gel or foaming cleanser to remove any leftover residue. This double cleansing makes sure your skin is truly clean and ready for products. It’s the core of any Korean routine – essential for a glass skin foundation.

    2. Exfoliate (1–2 times/week): On evenings when your skin feels dull, use a gentle exfoliant to sweep away dead cells. I favor a mild chemical exfoliant (like an AHA or BHA) because it dissolves flaky patches without scrubbing .This reveals fresh skin that can better reflect light (hello glow!). But don’t overdo it: most experts say 1–2 times a week is plenty. Over-exfoliating or using rough scrubs can irritate and actually make your skin drier or red. Listen to your skin – if it’s sensitive or red, skip this step or use a very gentle formula.

    3. Tone: After cleansing (and exfoliating, if it’s that night), sweep on a hydrating toner. These days toners aren’t the astringents of old – they’re basically a watery booster. A good toner will help restore your skin’s natural pH and give an extra hit of moisture. I pat it in with my hands or a cotton pad, and it feels like giving my skin a refreshing drink. Just avoid alcohol-heavy toners – instead, look for ones with humectants like glycerin or hyaluronic acid to pull moisture.

    4. Essence: This is the very Korean part! An essence is a lightweight, ultra-hydrating liquid that goes on before serum. It’s like a super-toner that helps products sink in. I apply a few drops of essence and press it into my face. As cited experts note, essence increases moisture retention and gives your routine a serious boost of hydration. It leaves my skin feeling plump and prepped. Essences often contain fermented ingredients or gentle acids, which can brighten and smooth over time.

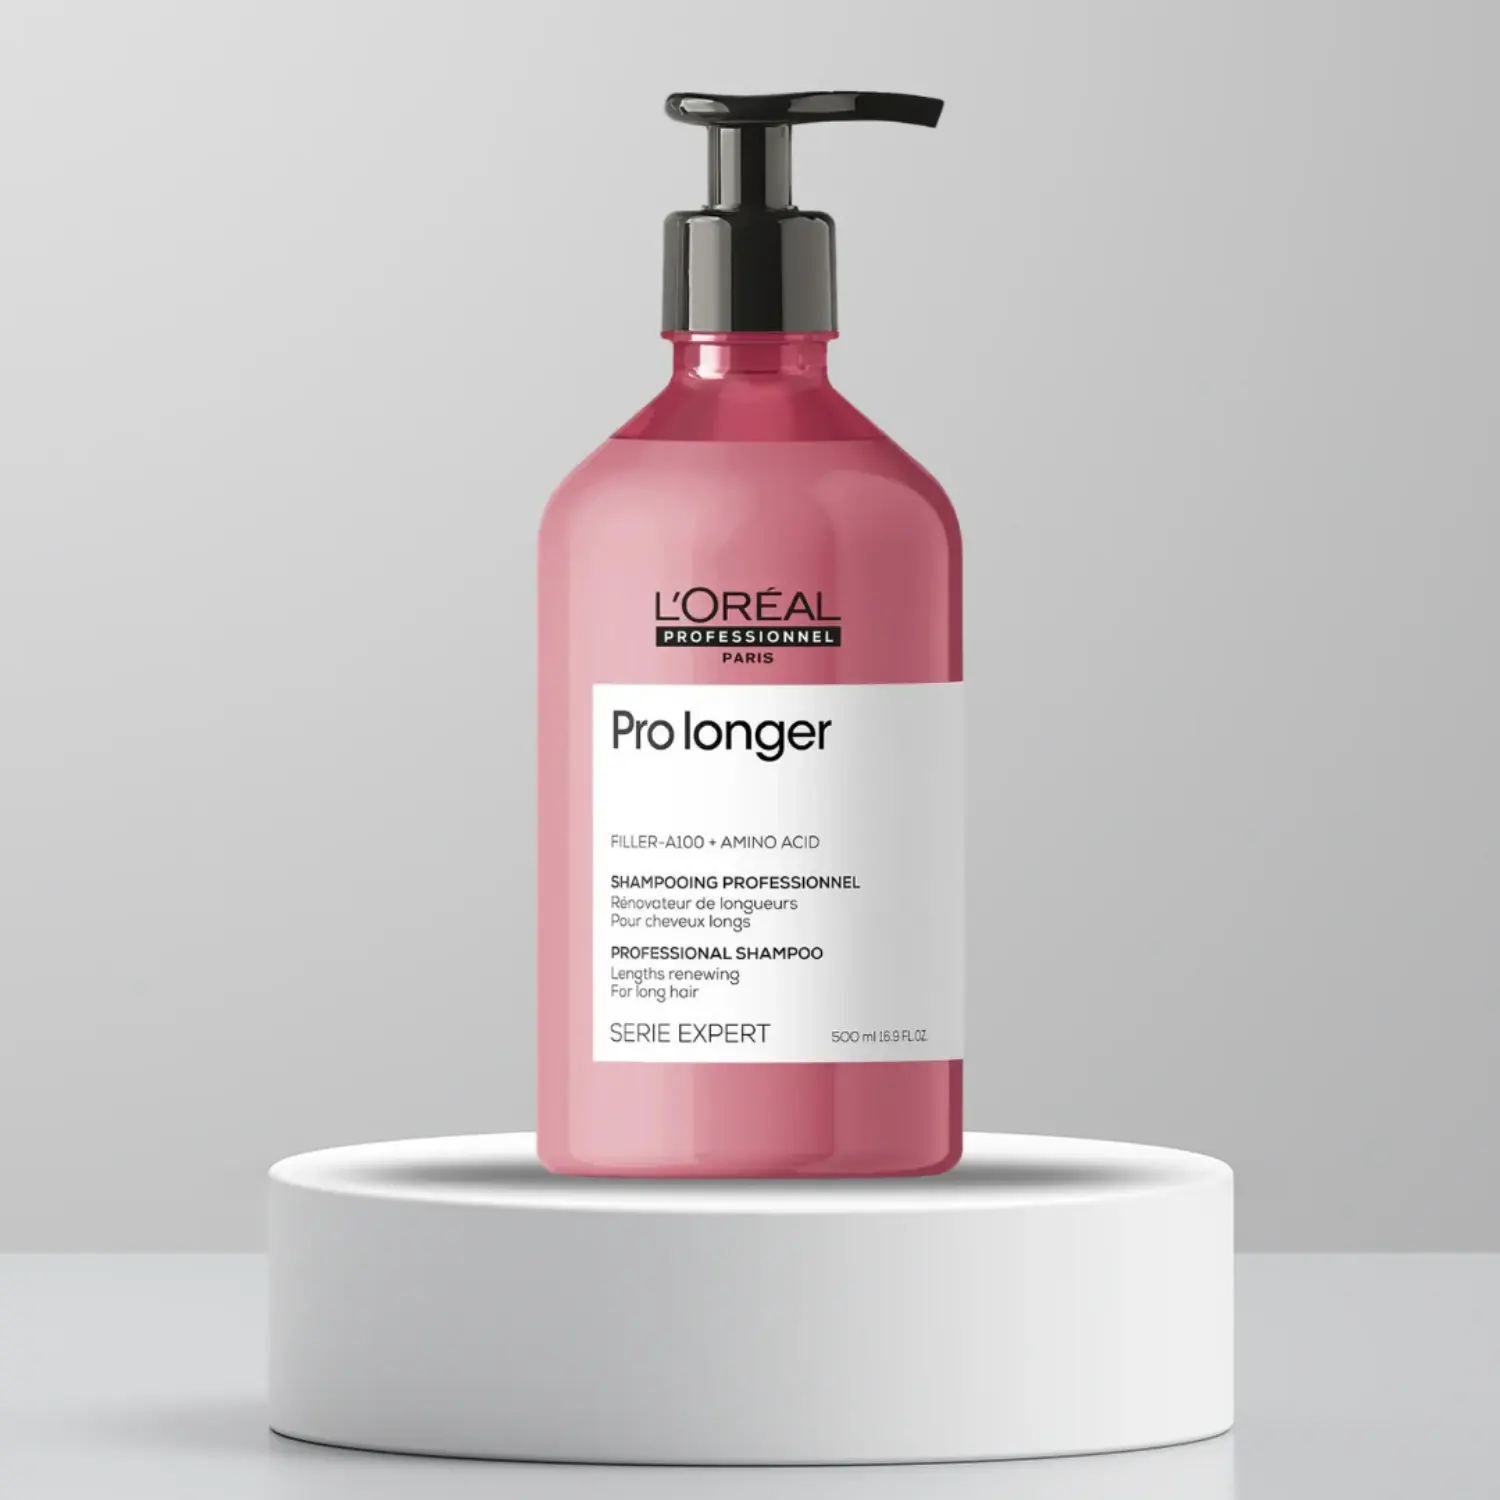
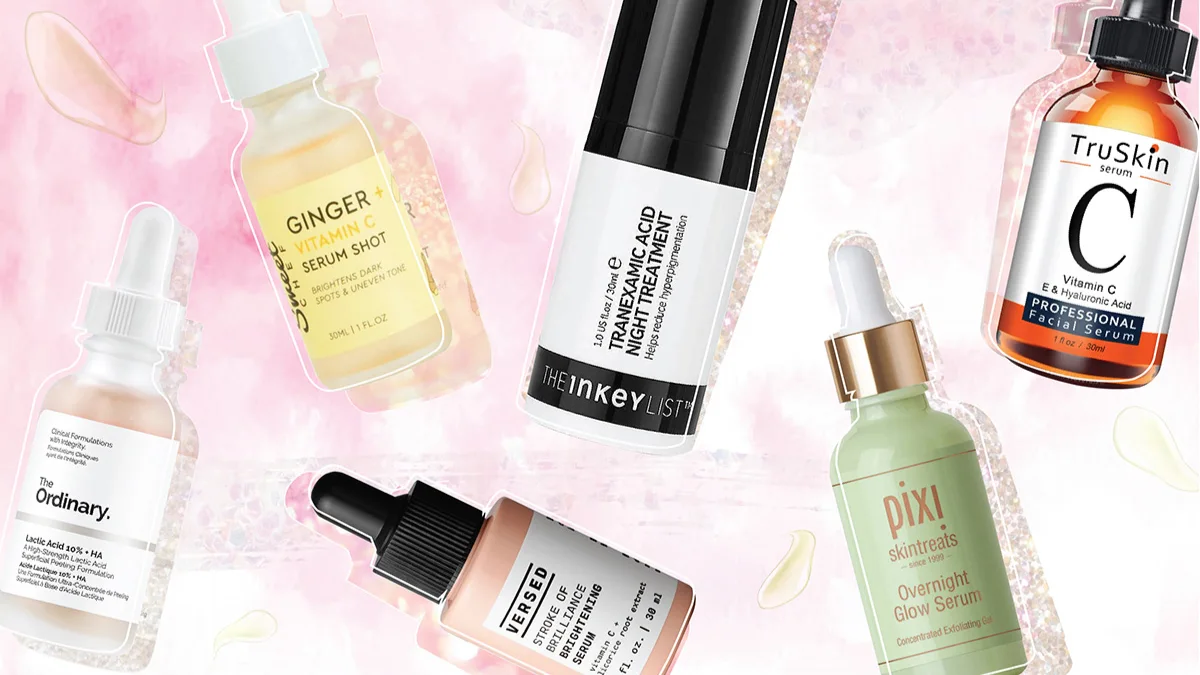
    5. Serum or Treatment: Now target your specific needs. Use a serum packed with active ingredients – like hyaluronic acid for hydration, vitamin C for brightening, or niacinamide for even tone. For glass skin, I love a hyaluronic-acid serum because it plumps up every line of my skin. Another tip is a lightweight face oil or hydrating lotion: ingredients like squalane or rosehip oil can seal in moisture without feeling greasy Just apply serums from thinnest to thickest (water-based before oil-based).

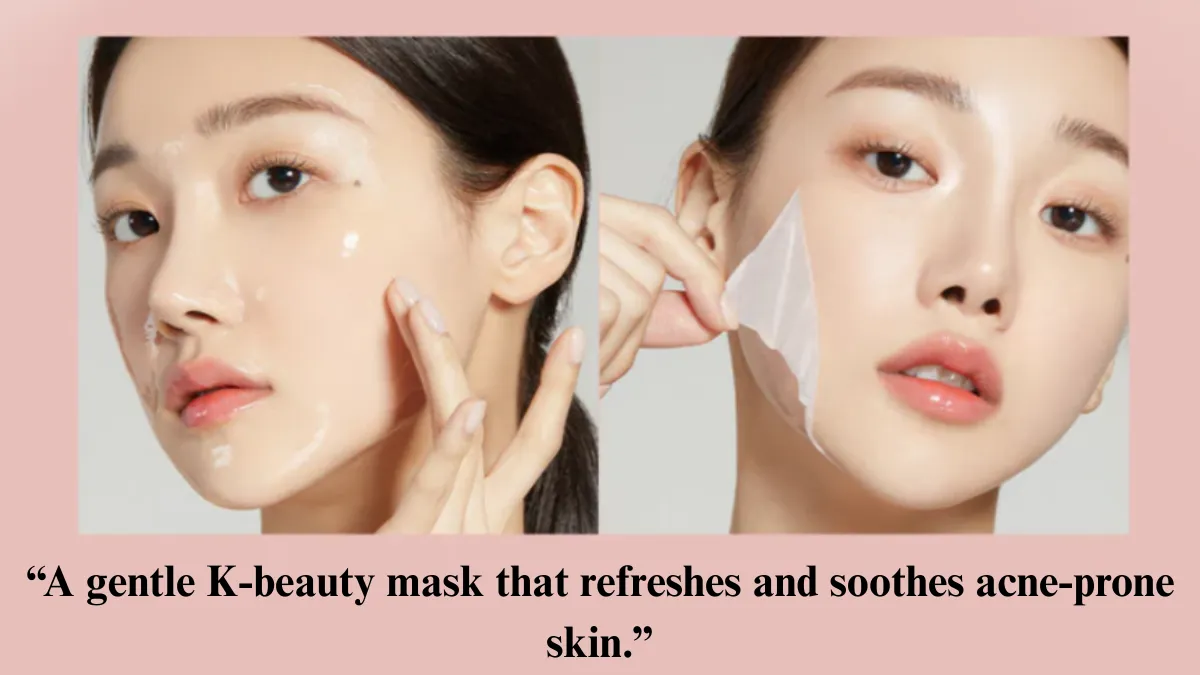
    6. Sheet Mask (Occasional Treat): While not every day, a sheet mask once or twice a week can push extra ingredients deep into your skin. Think of it as a short spa moment at home. You put the serum-soaked sheet on for 15–20 minutes and just relax. It’s packed with hydration and gives an instant surge of glow. If you love extra moisture or have a big event, this step feels wonderful. (Bonus: some people even use nourishing wash-off masks or natural remedies like a bit of honey in place of a sheet mask – honey is anti-inflammatory and locking in moisture.

    7. Moisturizer: This step locks everything in. I pick a moisturizer that delivers both humectants and occlusives. In practice, that means something with hyaluronic acid or glycerin plus creams or oils to seal the deal.The right moisturizer feels a bit like a drink for your skin: after it, my face looks noticeably plumper and feels supple. It shouldn’t feel heavy or greasy – even if you’re oily, there are gel-based or water-light moisturizers that hydrate without clogging.

    8. Sunscreen (AM Only): Never forget this. A broad-spectrum SPF 30 or higher is the final non-negotiable step in the morning. Think of sunscreen as the ultimate glow protector. It blocks UV rays that cause dullness, texture, and aging. I choose a hydrating, lightweight sunscreen (no white cast!) and wear it every day, even when it’s cloudy. This single step keeps the glow I worked for from getting washed out by sun damage.

    (Extra steps: I also use a hydrating eye cream at night since the under-eye area is delicate. And if you want, you can spritz on a facial mist or add a light second round of toner/essence layers (“7-skin method”) for ultimate hydration.)

    Here’s a simple video that shows the glass skin routine step by step. Watch it if you want to see how each step is done in real life.

    Ingredient Highlights – What Really Works

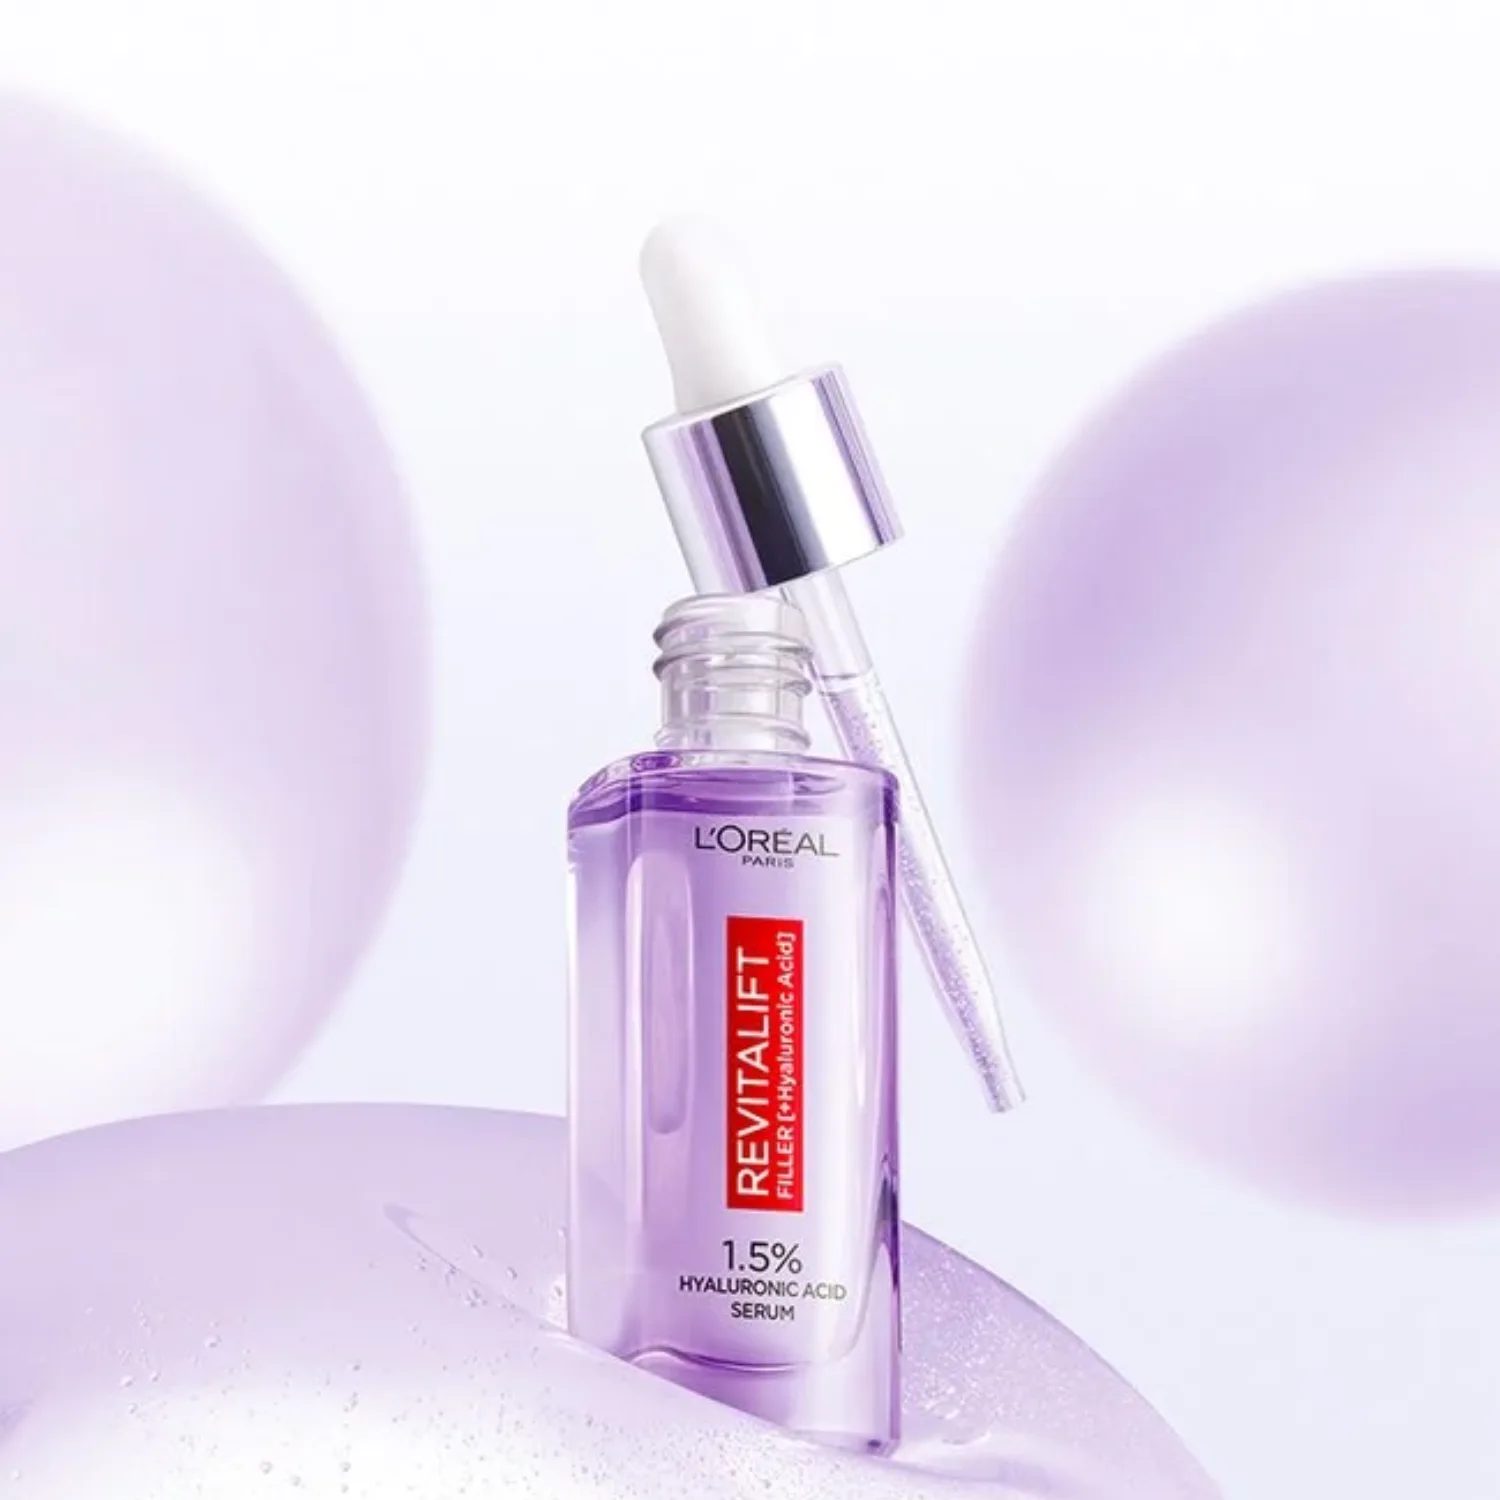
    • Hyaluronic Acid: This is a skin super-humectant that can hold 1,000x its weight in water. In plain terms, HA draws moisture from the air into your skin, keeping it plump. It slows water loss so your skin stays bouncy and dewy.

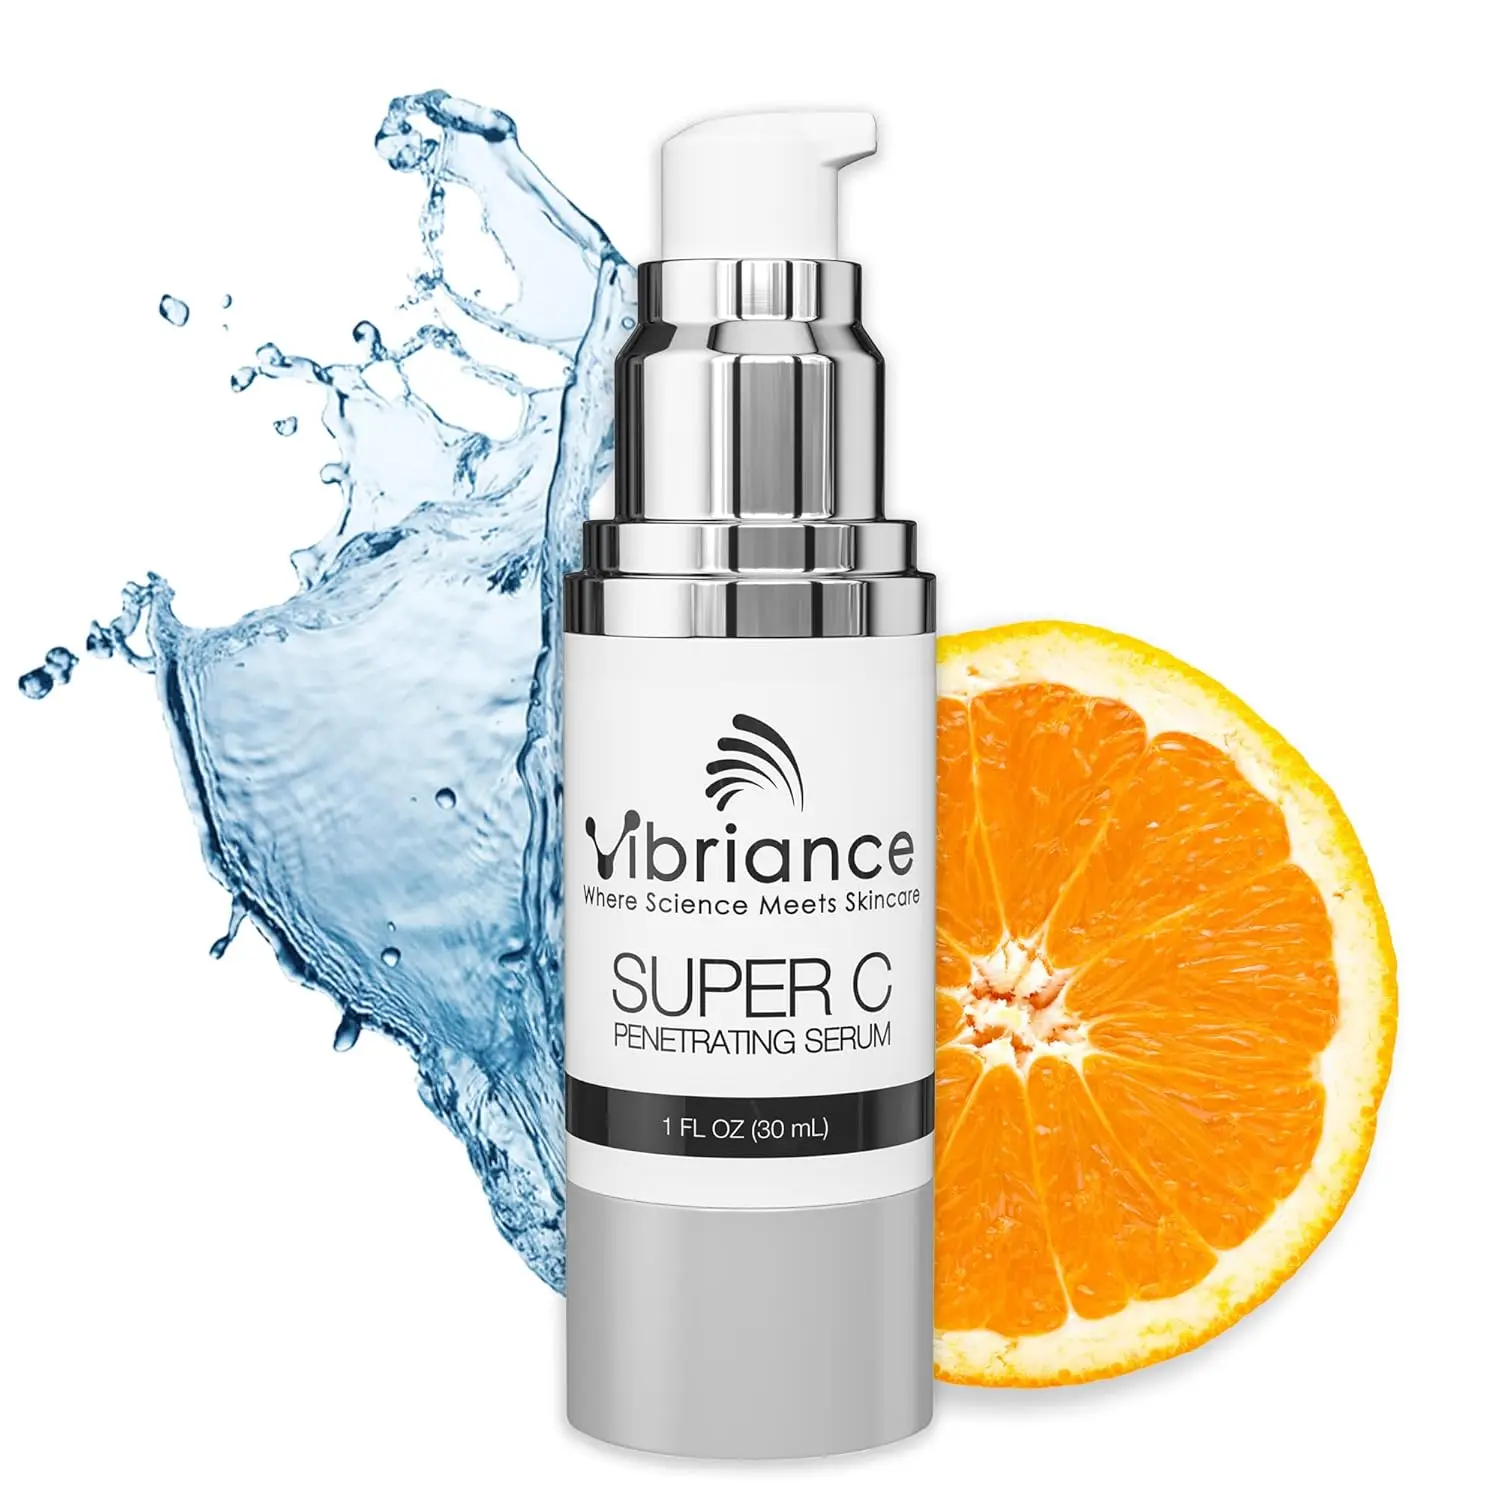
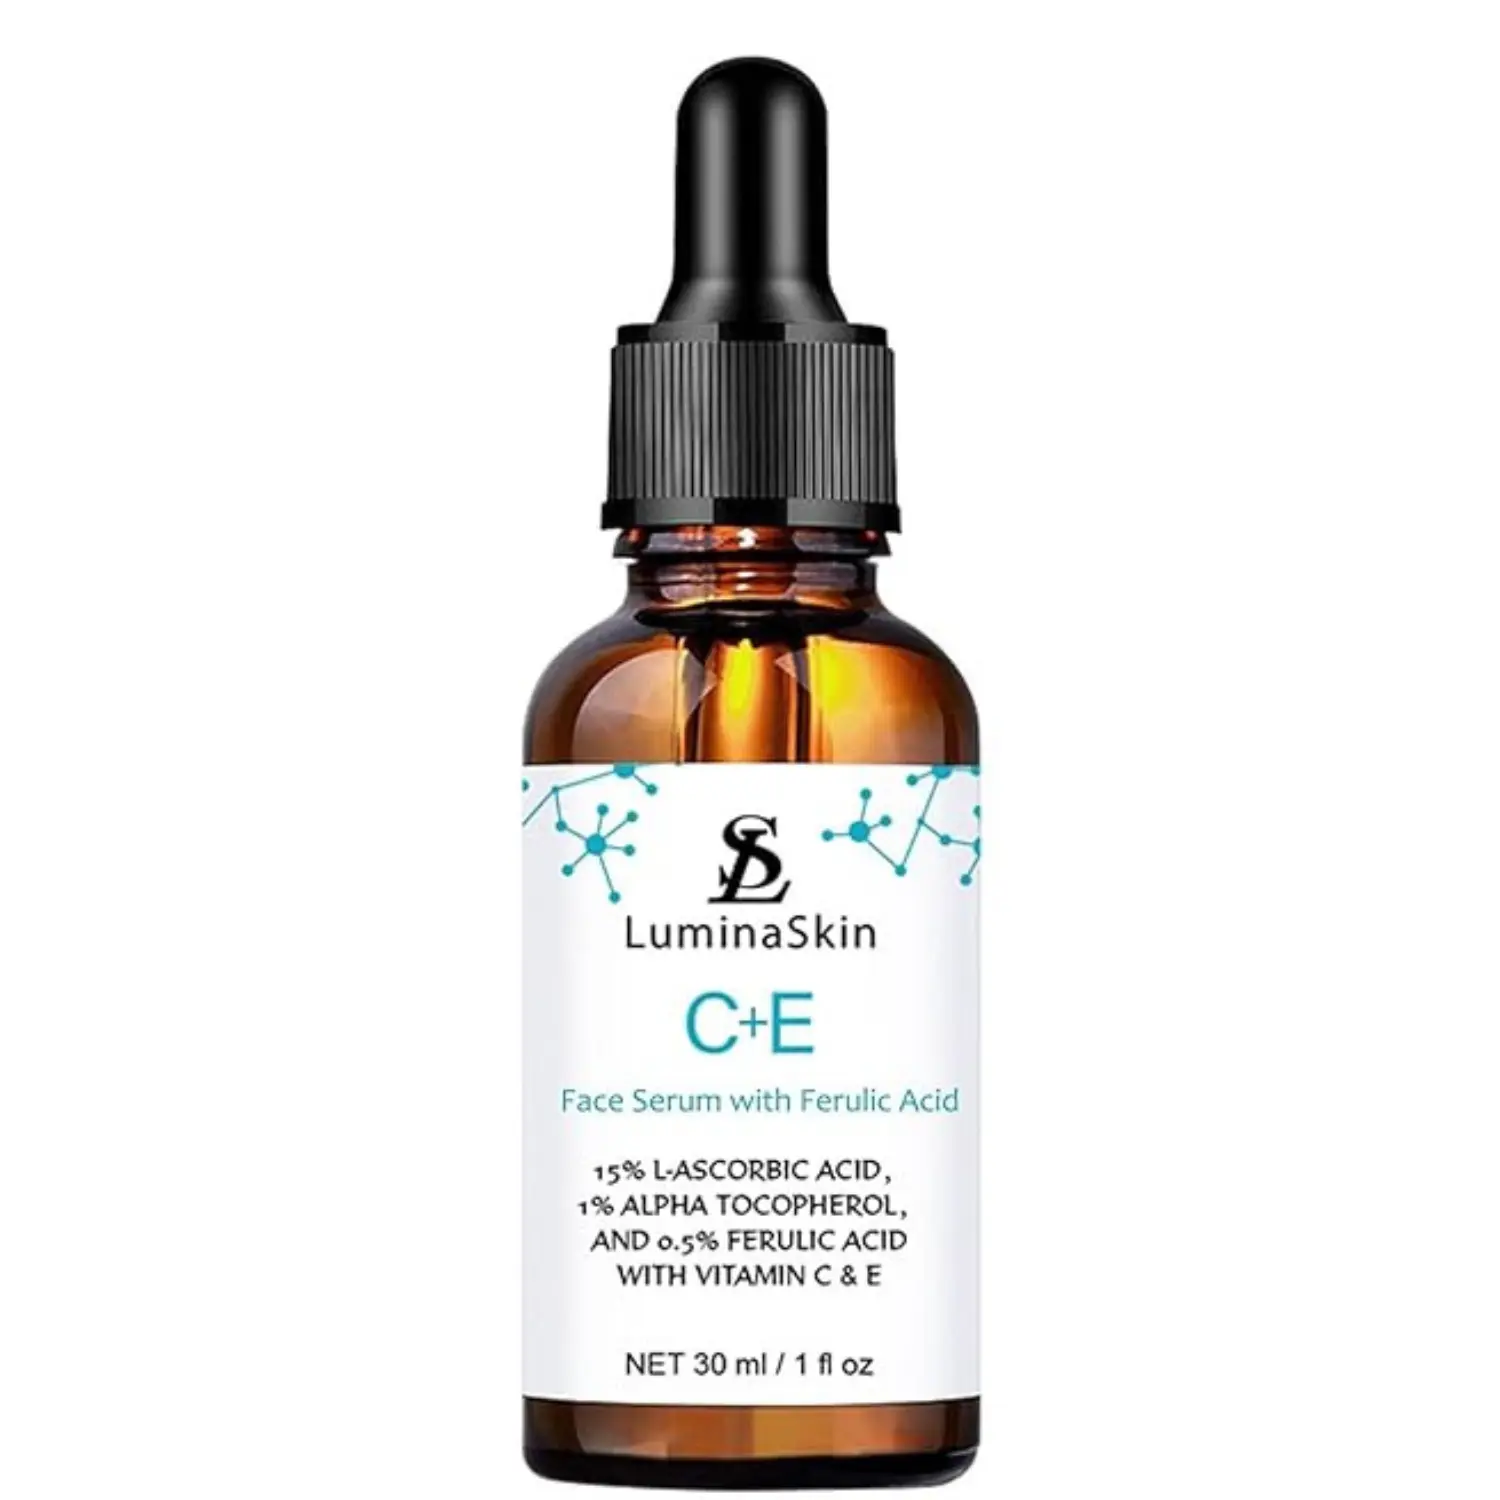
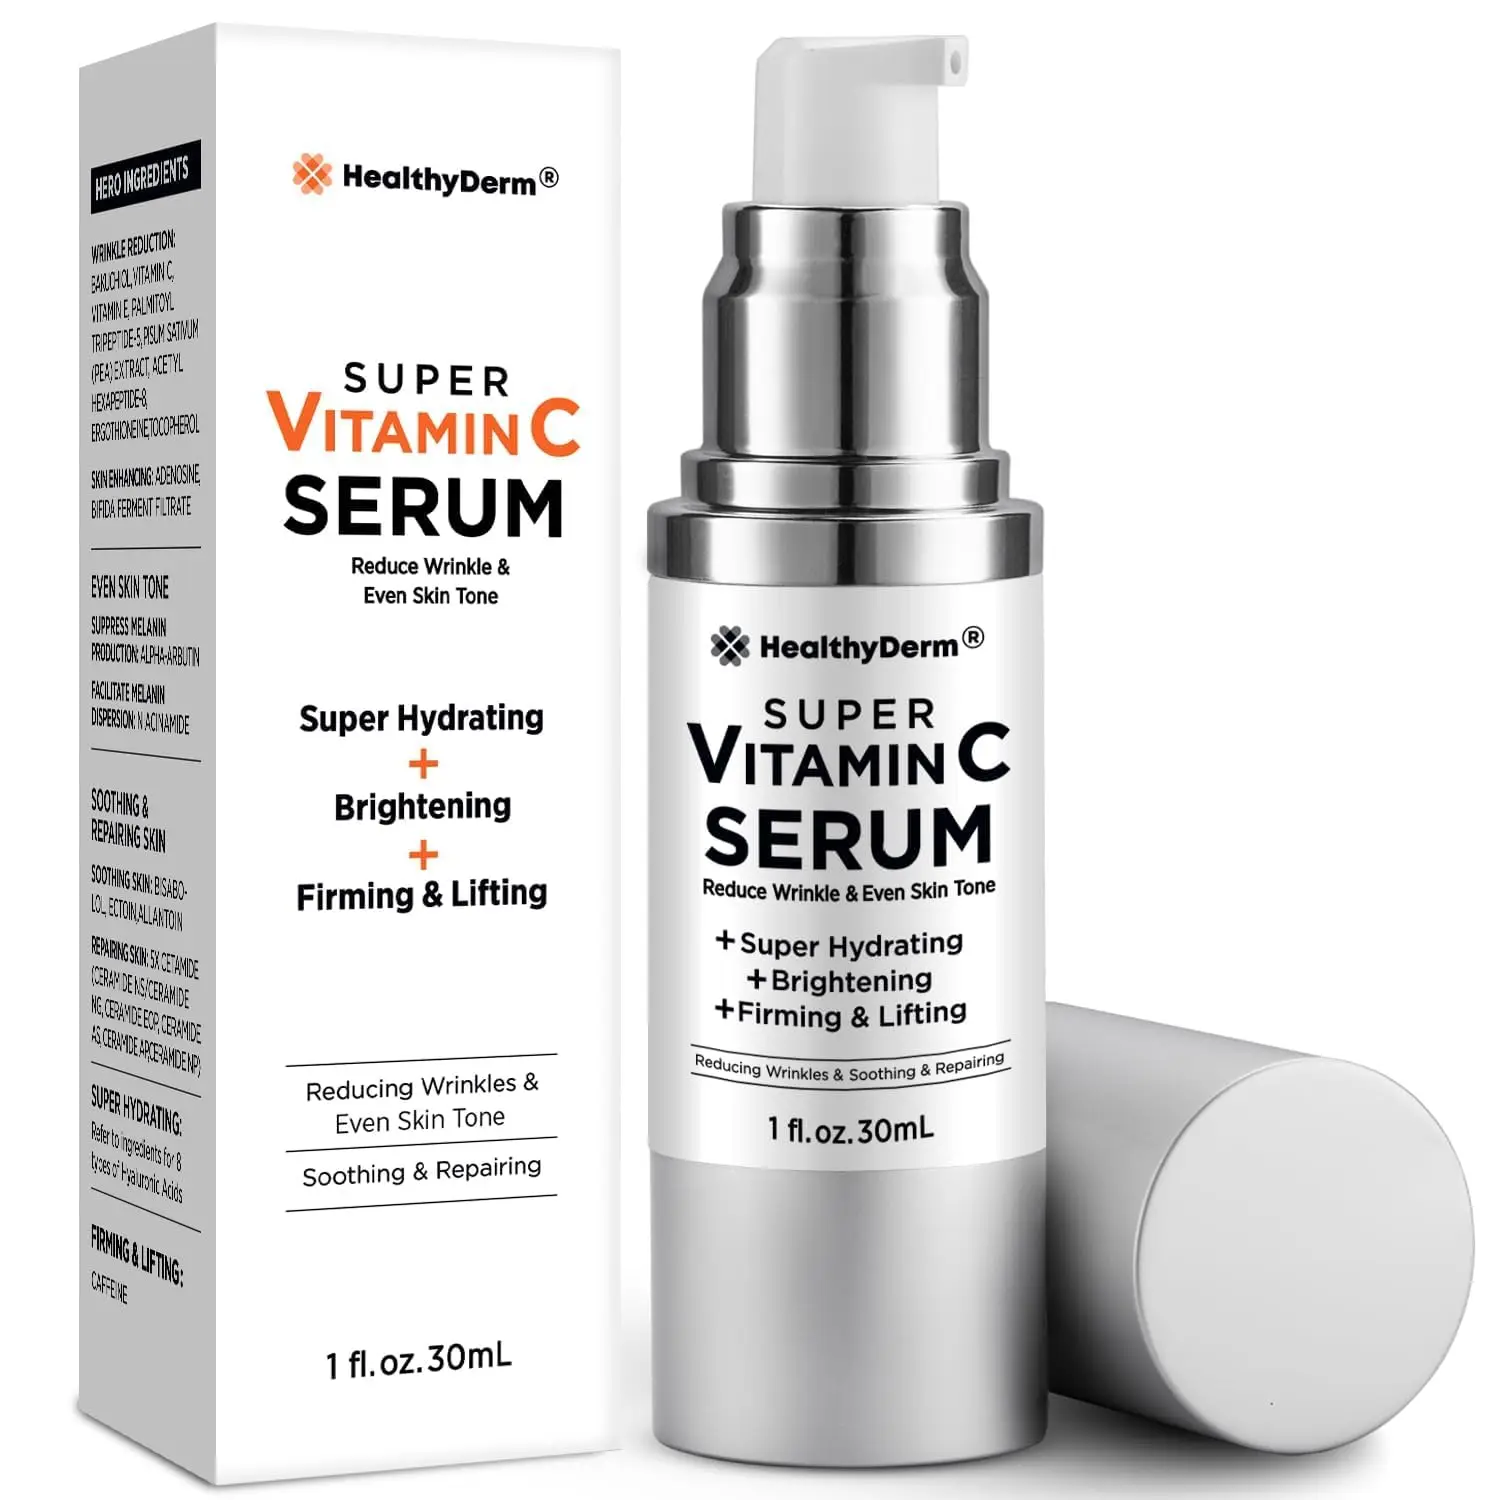
    • Vitamin C: A potent antioxidant, vitamin C brightens and evens tone. It helps protect against sun damage and inflammation, reducing dark spots and fine lines over time. For glass skin, C helps your face appear more luminous by fading dull discoloration and boosting natural radiance.

    • Niacinamide (Vitamin B3): Niacinamide is a multitasker. It strengthens the skin barrier, locking in moisture, and reduces redness or discoloration. It even helps regulate oil. This ingredient gives skin a plumper look and more uniform tone, contributing to that healthy glow.

    • Ceramides: These lipid molecules form your skin barrier. They prevent moisture loss and defend against irritants. When you replenish ceramides, your skin stays hydrated longer and looks smoother. Think of them as bricks in the wall that keep everything else from washing away.

    • Gentle Acids (AHAs/BHAs/PHAs): On exfoliation days, acids like glycolic or salicylic sweep away the dull, dead surface cells.This helps even out texture and uncovers the newer, glowing skin beneath. (Remember, use these sparingly – about once a week – so you reveal the glow without irritation.)

    Each of these ingredients supports hydration, barrier repair, or gentle turnover of cells, all of which contribute to that plump, reflective look.

    Tips for Consistency (and What to Avoid)

    • Keep it Simple, Stick with It: You don’t have to do all 10 steps every day forever. A pared-down 5-step AM routine (cleanse, tone, hydrate, protect) and a fuller PM routine can work. The key is doing something every day. Even if you’re tired, at least cleanse and moisturize. Over time, this builds the habitual glow.

    • Patch-Test & Go Slow: Whenever trying a new product (especially actives like acids or vitamin C), introduce it one at a time. Give each new thing a week before adding another. This way you know what works for you.

    • Hydrate Inside and Out: Drink plenty of water and eat well (fruits, healthy fats like avocado and salmon). Skin that’s dehydrated from the inside won’t look glassy. Aim for good sleep and less stress too – experts stress diet, hydration, and rest as part of the glow equation.

    • Avoid Harsh Ingredients: Skip high-alcohol toners or rough physical scrubs. These can dry you out or cause damage. Also avoid heavy makeup that clogs pores during the day. Use non-comedogenic formulas (especially sunscreen and makeup).

    • Don’t Skip SPF: It’s worth repeating. Sun is the #1 glow-thief. Even if you’re behind window glass or indoors, UV rays penetrate. A good daily SPF keeps your skin even-toned and healthy.

    • Be Gentle: Pat products on with your fingers instead of rubbing or tugging. Give each layer a moment to absorb (especially if you’re applying multiple layers). This respectful touch helps products penetrate and also protects your delicate skin.

    • Listen to Your Skin: If something irritates you (redness, burning), stop. Glass skin isn’t worth scarring your face. For example, if acids sting, hold back on exfoliating until your barrier recovers.

     Is It Worth It?

    Absolutely – if you’re in it for the long haul. Remember that glass skin is really a journey toward healthy skin. By consistently treating your skin to hydration and protection, you will see improvements. My own skin is proof: after weeks of this gentle routine, strangers remarked that I looked “lit from within.” It’s not an instant filter, but a glow built layer by layer.

    Some patience is needed. You may not wake up flawless, but over a month or two you should notice more radiance, smoother texture, and even tone. Think of it as self-care: “taking care of your skin is a form of self-love”. And hey, even if true glass-like perfection isn’t real, aiming for glowing health is totally worth it.

    So, are you ready to give this glass skin routine a try? What part are you most excited about – that pampering double cleanse, the yummy essence step, or finally wearing SPF every day? Let me know your thoughts or questions in the comments below. I can’t wait to hear about your journey to radiant, glassy skin. Happy glowing!

  • Medicube Mask for Acne, Scars & Hydration – Does It Really Work?

    Medicube Mask for Acne, Scars & Hydration – Does It Really Work?

    Medicube Mask for Acne, Scars & Hydration – Does It Really Work? If you’ve ever looked in the mirror and felt frustrated by breakouts, scars, or dull skin, trust me — I’ve been there too.
    As someone who’s spent years experimenting with different skincare products, I know how confusing it can be to find something that actually works.

    That’s how I came across the Medicube mask. It’s often marketed as a solution for acne, scars, and hydration — basically, three things most of us struggle with at some point. But does it really live up to the hype? In this article, I’ll share my honest experience, real stories from others, and what science-backed sources say about it. By the end, you’ll know whether it’s worth adding to your skincare routine.

    What Exactly Is the Medicube Mask?

    The Medicube Zero Pore One Day Serum Mask (one of their most popular) is designed to:

    • Soothe breakouts
    • Tighten pores
    • Fade scars
    • Add hydration

    Medicube is a Korean skincare brand that’s become a global name. They focus on dermatologist-tested formulas, and their masks are often used as quick treatments when your skin feels irritated, tired, or congested.

    But marketing promises are one thing. Let’s dive into how it performs in real life.

    If you’re looking for a complete step-by-step routine for that K-beauty glow, check out my Korean Glass Skin Routine guide.

    My Personal Experience with Medicube Mask

    When I first tried the Medicube mask, my skin was in one of its worst phases — breakouts along my cheeks and little red scars that just wouldn’t fade. I decided to test the mask for two weeks, using it every 2–3 days.

    Here’s what I noticed:

    • After the first use: My skin felt instantly calmer and more hydrated. The redness around my pimples went down slightly.

    • After a week: Some of the smaller breakouts healed faster, and my skin texture felt smoother.

    • After two weeks: While it didn’t magically erase my scars, I saw a clear improvement in how even my skin looked.

    The biggest surprise? My skin felt plump and hydrated without being greasy. I’ve used plenty of masks before, but this one left me feeling refreshed instead of sticky.

    What Other People Are Saying

    I didn’t want to rely only on my story, so I checked reviews and asked around in skincare groups.

    • One friend with sensitive skin said the Medicube mask helped calm flare-ups during her monthly cycle.

    • Another user shared that it faded her post-acne redness in just three uses.

    • On Reddit’s r/AsianBeauty, some people swore by it for hydration, while others said it worked best when paired with other Medicube Zero Line products like their pore serum.

    Of course, not everyone had a perfect experience. A few said the results were subtle, especially for deep scars. That makes sense — no mask can fully replace dermatological treatments.

    “Check out this video review that shows how Medicube’s Collagen Night Wrapping Mask works for acne and dull skin.”

    The Science Behind It

    Generated imageWhy does this mask actually work for acne and scars?

    1. Niacinamide – A key ingredient that helps fade dark spots and strengthen the skin barrier. According to Healthline, niacinamide is one of the most effective over-the-counter ingredients for acne scars.

    2. Centella Asiatica (Cica) – Known for calming inflammation and healing wounds. Great for sensitive skin.

    3. Hyaluronic Acid – Deeply hydrates the skin, keeping it plump and preventing dryness that can trigger breakouts.

    4. Tea Tree Extract – Naturally antibacterial, which is why so many acne treatments include it.

    When you put all of this together in a single sheet mask, it explains why so many people feel an instant soothing effect.

    Pros and Cons of Medicube Mask

    Like any skincare product, this mask isn’t perfect. Here’s my honest breakdown:

    Pros

    • Calms irritation and redness fast

    • Hydrates without being greasy

    • Lightweight and gentle formula

    • Travel-friendly sheet mask packaging

    • Works well before special events (skin looks refreshed)

    Cons

    • Results on scars are gradual, not instant

    • A bit pricey compared to drugstore masks

    • Works better with consistent use, not a one-time miracle

    How to Use Medicube Mask Effectively

    Here’s what I recommend based on my routine and expert advice:

    1. Cleanse properly – Don’t apply a mask on dirty skin. Use a gentle cleanser first.

    2. Apply after toner – This helps the serum from the mask absorb better.

    3. Leave it on for 15–20 minutes – Don’t exceed 30 minutes, or it may dry out.

    4. Massage in the essence – Pat the leftover serum into your skin instead of washing it off.

    5. Seal with moisturizer – Lock everything in so your skin stays hydrated.

    Pro tip: If your skin feels irritated after sun exposure or a long day, put the mask in the fridge for 15 minutes before applying. The cooling effect is heavenly.

    “If you want to dive deeper into how this product works, check out the secret to soft skin with Medicube Collagen Night Wrapping Mask for a detailed breakdown.”

    Is It Worth Buying for Acne & Scars?

    Here’s the truth: If you’re looking for a quick fix for deep acne scars, the Medicube mask alone won’t be enough. Dermatological treatments like microneedling or laser are better for that.

    But — if you want:

    • A way to calm acne flare-ups

    • Faster healing of small scars

    • Extra hydration for tired skin

    Then yes, this mask is definitely worth it.

    As Allure points out, even the best acne masks aren’t overnight cures, but they can be powerful support products in your routine. Medicube fits that category perfectly.

    Alternatives to Try

    If you can’t find Medicube in your area, or just want to compare, here are some alternatives:

    • Cosrx Acne Pimple Master Patches – Great for active pimples

    • Dr. Jart+ Cicapair Mask – Amazing for calming redness

    • Laneige Water Sleeping Mask – A cult favorite for hydration

    Does Medicube Mask Really Work?

    From my experience (and the stories I’ve collected), the Medicube mask delivers on hydration and calming acne. It also helps with surface-level scars, though it won’t erase deep marks on its own.

    It’s one of those products I keep in my skincare drawer for emergencies — before an event, after a breakout, or when my skin just feels “blah.”

    If you want to test it yourself, you can find the official product on Medicube’s website.

    At the end of the day, skincare isn’t about finding a perfect product — it’s about finding the right mix that works for your skin. The Medicube mask may not be magic, but it’s a solid tool in the fight against acne, scars, and dullness.

    Have you tried the Medicube mask before? Or do you have another sheet mask that’s been a lifesaver for your skin?
    I’d love to hear your thoughts in the comments — let’s swap skincare secrets!

  • Top Nail Designs of 2025 That Everyone’s Talking About — From Minimalist to 3D Glam”

    Top Nail Designs of 2025 That Everyone’s Talking About — From Minimalist to 3D Glam”

    If you’re anything like me, your nails are more than just an accessory—they’re a whole mood. And in 2025? Nail art is having a *moment*. From clean, minimalist designs to sculpted 3D masterpieces, this year’s trends are turning fingertips into fashion statements. Whether you’re getting ready for a summer festival, planning your wedding look, or just want something fresh for the weekend, this guide will walk you through the top nail designs everyone’s obsessed with right now.

     Simple Nail Designs That Are Still Trending

    Sometimes, less really is more. And in 2025, simplicity is still leading the way. Minimalist nail art isn’t boring—it’s smart, chic, and surprisingly expressive.

     Minimalist Dots and Lines

    Think tiny dots along the cuticle or a thin stripe down the middle. These designs are all about precision. I love pairing burgundy dots with a neutral base or adding a single metallic accent for a bit of flair. Want to try this at home? Grab a dotting tool—or a bobby pin works too.

    Pastel Ombre

    Soft gradients never go out of style. Especially for almond-shaped nails, a pastel ombre (like pink fading into white or mint into lavender) feels dreamy without being overdone. Pro tip: Use a makeup sponge to blend your colors—it’s easier than you’d think.

     Modern French Tips

    The classic French manicure has had a serious glow-up. Think crème-white tips instead of bright white, or switch it up with pastels, metallics, even micro-French lines that make short nails look longer. You can also flip the script with a reverse French—highlighting the base instead of the tip.

     Summer 2025 Nail Trends Everyone’s Loving

    Summer nails are supposed to be fun, bold, and a little wild. And this year’s looks totally deliver.

     Fruit-Inspired Nails

    Tiny cherries, lemons, watermelon slices—fruit nails are everywhere. They’re playful but not childish, especially when paired with nude or pastel backgrounds. If you want something subtle, try a single fruit accent on just one nail.

    Watch our step-by-step tutorial below on how to try the 3D Fruit Nail Trend at home using gel polish on natural nails—it’s beginner-friendly and so fun to recreate!

    Neon Aura Nails

    This one’s a showstopper. Using airbrushed gradients, aura nails look like they’re glowing. Think hot pink melting into orange or electric blue fading to purple. They look high-maintenance but work on almost any nail shape. Total summer energy.

     Mermaidcore and Ocean Vibes

    Shimmery blues, 3D shells, and even little “water droplet” effects are making waves (pun intended). These designs feel magical and pair perfectly with beachwear or a coastal wedding vibe. You don’t need long nails either—most salons can simplify the look for shorter styles.

    Wedding & Occasion-Ready Nail Art

    When it comes to weddings, your nails should feel like part of your outfit—not an afterthought.

     Lace and Pearl Details

    For brides, lace-inspired nail art and tiny pearl accents are timeless. They match everything from your gown to your earrings, and they look amazing in close-up ring shots. If you’re after subtle glam, a single pearl on one or two fingers does the trick.

    Red & Gold for Traditional Ceremonies

    In many cultures, red and gold aren’t just pretty—they’re symbolic. Whether it’s a Chinese or South Asian wedding, this color combo brings richness and meaning. Think gold chrome, glitter ombre, or even jewel-like accents.

     Personalized Touches

    Want something truly personal? Add your initials, wedding date, or even a mini heart design. I’ve seen brides go for subtle monograms on the ring finger or tiny rhinestone-studded letters. It’s a small detail, but it makes a big impact.

     Textured and 3D Nail Trends Taking Over 2025

    Texture is *everything* right now. We’re seeing nails that aren’t just pretty—they’re touchable.

    Velvet Nails

    Created with magnetic polish, velvet nails shift in the light and feel luxe without being flashy. Popular colors? Deep burgundy, champagne, and smoky grey. It’s like crushed velvet for your fingertips.

    Glass and Foil Nails

    Shattered foil gives a broken-glass effect that’s pure glam. And glass nails? Super glossy, almost see-through with a jelly-like depth. You’ll get compliments, trust me.

    3D Florals

    These aren’t stickers. They’re sculpted mini-artworks—tiny roses and daisies made from acrylic or gel. They’re perfect for special events or anyone who wants their nails to feel like jewelry.

    Beginner-Friendly Tips for Gorgeous Nail Art

    You don’t need to be a pro to have good nails. You just need a few basics and a little patience.

    Want to see how it’s done in real-time? Check out this nail art hack video—it’s packed with beginner-friendly tricks that actually work:

    What You Actually Need

    Start with nail polish in a few go-to colors, a base and top coat, a small detail brush, dotting tool, and maybe a sponge for ombre. Stickers and decals are lifesavers too. Trust me, the right tools change everything.

    DIY vs. Salon

    DIY saves money—and gives you control. A starter kit costs less than a salon visit and covers several manicures. But for things like 3D florals or perfect chrome? The pros are worth it.
    In fact, this article from The Fox Magazine breaks down the real pros and cons of salon nails vs. doing them at home—definitely worth a read if you’re still deciding.

    Make It Last

    Thin layers = better wear. Always seal the edges of your nails, reapply top coat every few days, and moisturize with cuticle oil. Oh, and wear gloves for chores. Your nails will thank you.

    Looking for even more inspo? Explore these trending BTS nail art designs for 2025—they’re bold, stylish, and totally recreatable at home.

    Final Thoughts

    2025 is all about expressing yourself—loudly or quietly—through your nails. You don’t have to choose between being trendy or timeless. You can do both.

    So which look are you trying first? Subtle French, fruity vibes, velvet textures? Whatever you pick, remember: your nails say a lot about you. Might as well make them unforgettable.

  • How to Use Hair Mask for Best Results: Step-by-Step Guide for All Hair Types

    How to Use Hair Mask for Best Results: Step-by-Step Guide for All Hair Types

    Ever applied a hair mask and felt like… “Wait, did that even do anything?”
    Yeah, I’ve been there. I used to slap on a mask, rinse it off in five minutes, and wonder why my hair still felt like straw the next day. Turns out, most of us are doing it wrong — not because we don’t care, but because no one ever told us how to use it right for our actual hair type.
    Whether your hair is curly, straight, oily, frizzy, colored, or just plain confused — I’m breaking it all down for you. No fluff. Just the real stuff that works.

    Why Hair Masks Matter (More Than You Think)

    A good hair mask isn’t just a “nice-to-have.” It’s like therapy for your hair.
    Think of all the stress your strands go through — heat styling, sun, pollution, chemical treatments, hard water… It’s a lot. A hair mask dives deeper than a conditioner, giving your hair that intense moisture and repair it’s been begging for.
    And no, it doesn’t need to be expensive. What matters is how you use it.

    Still wondering if hair masks are worth it? This video reveals why they’re a must-have in your haircare routine!

    Step-by-Step: How to Use a Hair Mask the Right Way

    Step 1: Start with Clean, Damp Hair
    Don’t apply a hair mask to dirty or bone-dry hair. Always shampoo first to clear out oil and product build-up — your hair needs a clean canvas to soak up the good stuff.
    Towel-dry gently until your hair is damp (not dripping wet). This helps the mask absorb better.
    Step 2: Section Your Hair


    Divide your hair into 2–4 sections (especially if it’s thick or curly). This sounds small but makes a big difference. You’ll get better product coverage without overusing the mask.
    Step 3: Apply From Mid-Lengths to Ends
    Avoid your roots unless the mask is specifically meant for scalp use. Focus on the mid-lengths and ends — that’s where most of the damage lives.
    Use your fingers or a wide-tooth comb to spread the mask evenly. Don’t just plop it on and hope for the best.
    Step 4: Let It Sit (But Not Too Long)
    Read the label. Most masks need 5–15 minutes.
    Don’t leave it on for an hour unless the brand says it’s safe — too much protein or oil can actually weigh your hair down or make it greasy.
    For extra oomph? Wrap your hair in a warm towel or use a shower cap. It traps heat and helps the mask penetrate deeper.
    Step 5: Rinse with Cool or Lukewarm Water
    Rinsing with hot water strips moisture. Cool or lukewarm water seals the cuticle and locks in that softness.
    Make sure you rinse thoroughly — leftover product can make your hair feel sticky or heavy.

    Ready to see it all in action? This quick tutorial shows how to apply your hair mask perfectly step by step.

    How Often Should You Use a Hair Mask?

    Dry/Damaged Hair: 1–2 times a week

    Oily Hair: Once every 10–15 days (and stick to ends!)

    Curly/Color-Treated Hair: Weekly is your sweet spot

    More isn’t always better — consistency matters more than frequency.
    Not sure how often you should be using a hair mask?
    You’re definitely not alone! I found this expert advice super helpful — it breaks down what hair masks really do and how to use them the right way.

    Real Talk: What Most People Get Wrong

    Here’s what I’ve seen (and done myself):

    • Skipping shampoo before applying the mask
    • Applying to soaking wet hair (the product just slides off)
    • Using way too much product
    • Leaving it on forever, hoping for miracles
    • Not rinsing it out properly

    If your mask isn’t working, the problem usually isn’t the product — it’s the method.

    Pick the Right Mask for Your Hair Type

    This part’s non-negotiable. Here’s a quick cheat sheet:

    • Dry/Frizzy: Look for ingredients like shea butter, argan oil, coconut oil
    • Oily/Flat: Lightweight masks with clay, tea tree, or charcoal
    • Colored Hair: Sulfate-free, color-protect masks with keratin or amino acids
    • Curly Hair: Rich masks with aloe vera, jojoba oil, and no heavy silicones
      Always read the label — don’t fall for just “pretty packaging.”

    Watch this quick video to learn how to pick the right hair mask for your hair type—whether you have dry, oily, or normal hair.

    Final Pro Tips

    • Don’t treat a hair mask like a quick fix. It’s a habit, not a hack.
    • Heat opens the hair cuticle. So, a warm towel or steam while masking? Game changer.
    • Be patient. You’ll see better results after 3–4 consistent uses.

    Want to level up your hair game even more? Don’t miss these Top 7 Hair Care Tips for Healthy, Shiny Hair in 2025 — because great hair starts with smart habits.

    Over to You

    What’s your go-to hair mask trick? Or have you been using it all wrong too (like I did)?
    Drop your thoughts below — or shoot me your hair type, and I’ll help you pick the perfect mask. Let’s fix that hair routine, one mask at a time.

  • 7 Best Shampoos for Stronger Hair Under $150

    7 Best Shampoos for Stronger Hair Under $150

    This post may contain affiliate links: Read the disclosure.

    I have been down the rabbit hole of hair fall solutions more times than I would like to admit. If you were tired of watching clumps of hair swirl down the drain. You are not alone. The good news? You don’t have to spend a fortune to find a shampoo that really helps.

    But here’s the thing: you don’t have to empty your wallet to start seeing a difference. I have spent months trying different shampoos, reading reviews, and comparing ingredients. And I have put together this list of seven shampoos under $150 that actually help reduce shedding and make hair feel stronger.

    If you are looking for something that feels like a real solution—not just another bottle that ends up half-used in your shower—these picks are worth your time.

    Biotin & Rosemary Shampoo For Hair Growth

    This shampoo blends biotin, rosemary, and botanical extracts like aloe vera, ginger root, and saw palmetto to help strengthen thinning hair and support healthy growth. This gentle formula soothes your scalp, reduces breakage, and leaves hair feeling soft, shiny, and refreshed.


    [su_button url=”https://amzn.to/40GzO2t” target=”blank” style=”3d” background=”#1b2b43″ size=”5″ center=”yes” radius=”0″ icon=”icon: shopping-cart” bold=”yes”]SHOP NOW [/su_button]

    Moerie Ultimate Hair Growth Shampoo

    This Shampoo harnesses 77 minerals, biotin, caffeine, and B vitamins to help boost keratin and encourage fuller, stronger hair. In just 30 days, you will notice softer, silkier strands, with visible thickness over time. This vegan, sulfate- free formula works for all hair types—no complicated routines required.


    [su_button url=”https://amzn.to/3GAKnNL” target=”blank” style=”3d” background=”#1b2b43″ size=”5″ center=”yes” radius=”0″ icon=”icon: shopping-cart” bold=”yes”]SHOP NOW [/su_button]

     Rice Water Hair Growth Shampoo

    This Rice Water hair growth shampoo draws on the Yao women’s rice water tradition to help strengthen and nourish thinning hair. With biotin, rosemary, and ginger root, this gentle formula promotes growth and shine without sulfates or synthetic fragrances. 


    [su_button url=”https://amzn.to/40B8cvI” target=”blank” style=”3d” background=”#1b2b43″ size=”5″ center=”yes” radius=”0″ icon=”icon: shopping-cart” bold=”yes”]SHOP NOW [/su_button]

    Onion Biotin and Rosemary Shampoo

    This shampoo has a two-step system that repairs damage, boosts density, and leaves hair feeling soft  and hydrated without harsh chemicals. This is perfect for all hair types— curly, wavy, or straight— it provides deep nourishment, shine, and protection in your daily routine.


    [su_button url=”https://amzn.to/3Ieymy6″ target=”blank” style=”3d” background=”#1b2b43″ size=”5″ center=”yes” radius=”0″ icon=”icon: shopping-cart” bold=”yes”]SHOP NOW [/su_button]

    Nutrafol Shampoo

    This shampoo is a physician-formulated cleanser that hydrates your hair and scalp while boosting volume, strength, and texture. It is safe for color-treated hair, this sulfate-free formula helps reduce dryness, flakiness ,and excess oil—perfect for thinning hair that needs gentle, effective hair.


    [su_button url=”https://amzn.to/4krVuXc” target=”blank” style=”3d” background=”#1b2b43″ size=”5″ center=”yes” radius=”0″ icon=”icon: shopping-cart” bold=”yes”]SHOP NOW [/su_button]

    Reviv 3 Procare Prep Cleanser Shampoo

    This shampoo is a sulfate- free formula that gently exfoliates the scalp removing DHT, build up,and impurities that can contribute to thinning hair. Rich in proteins and vitamins, it helps create a foundation for thicker, fuller hair while staying safe for color-treated strands.


    [su_button url=”https://amzn.to/405PPit” target=”blank” style=”3d” background=”#1b2b43″ size=”5″ center=”yes” radius=”0″ icon=”icon: shopping-cart” bold=”yes”]SHOP NOW [/su_button]

    L’Oréal Pro Longer Thickening Shampoo

    This Shampoo helps revive thin, damaged hair by reducing breakage by up to 94% and minimizing split ends. Enriched with amino acids, it thickens and resurfaces each strand for stronger, fuller-looking hair with 5x more shine.


    [su_button url=”https://amzn.to/3GuuWH1″ target=”blank” style=”3d” background=”#1b2b43″ size=”5″ center=”yes” radius=”0″ icon=”icon: shopping-cart” bold=”yes”]SHOP NOW [/su_button]

    Remember,everyone’s hair is different, so what works for one person might work for another. The good news is, you don’t have to guess in the dark.Each shampoo on this list has earned trust for a reason, and they are all easy to try without spending a fortune.

    Whether you are hoping to reduce hair fall, strengthen weak strands, or simply bring back your natural shine, these affordable options under $150 are proof that effective solutions are within reach.

    Here’s to feeling confident every time you run your fingers through your hair!

    Ready to make a change? Check out your favorite pick and see the results for yourself.

  • Best Affordable Serums Under $100 for Glowing, Healthy Skin

    Best Affordable Serums Under $100 for Glowing, Healthy Skin

    This post may contain affiliate links: Read the disclosure.

    If you have ever dreamed of achieving dewy, radiant skin without draining your bank account, you are not alone. The good news? You don’t have to spend hundreds of dollars to get a serum that actually works. Whether you are targeting dullness, uneven texture, fine lines, or stubborn dark spots, there are plenty of powerful formulas under $ 100 that deliver impressive results.

    When choosing a serum, it is essential to consider your skin type and concerns.

    I have rounded up some of the best serums you can buy right now— all tested, loved, and budget- friendly. With the right serum, you can achieve the radiant skin you have always wanted. 

     Try one of these Top Affordable serums today and get ready to glow with confidence!

    10 Best Affordable Serums For Glowing Skin


    Olay Super Serum

    [su_button url=”https://amzn.to/3GyQP81″ target=”blank” style=”3d” background=”#1b2b43″ size=”5″ center=”yes” radius=”0″ icon=”icon: shopping-cart” bold=”yes”]SHOP NOW [/su_button]

    Olay Super Serum is a powerful 5-in-1 facial serum that outperforms that  luxury serum. Clinically tested, it improves skin texture, evens tone, firms, smooths lines, and delivers lasting hydration. Infused with Activated Niacinamide, Vitamin C, Collagen Peptide, Vitamin E, and AHA, it absorbs fast without stickiness for visible results from day one. Simplify your routine with this multitasking serum for radiant, healthier- looking skin.

    L’Oreal Paris Revitalift Serum

    [su_button url=”https://amzn.to/4eCaros” target=”blank” style=”3d” background=”#1b2b43″ size=”5″ center=”yes” radius=”0″ icon=”icon: shopping-cart” bold=”yes”]SHOP NOW [/su_button]

    Revitalift Derm Intensive 1.5% Pure Hyaluronic Acid Serum with Vitamin C is dermatologist- validated anti- aging serum that deeply hydrates, replumps skin, and visibly reduces wrinkles by up to 47% in 6 weeks. Fragrance- free and free of parabens, minerals oil, and dyes, this lightweight serum suits all skin types— including sensitive and mature skin — for dewy, smoother-looking results.

    Vibriance Super Serum

    [su_button url=”https://amzn.to/44HLoMi” target=”blank” style=”3d” background=”#1b2b43″ size=”5″ center=”yes” radius=”0″ icon=”icon: shopping-cart” bold=”yes”]SHOP NOW [/su_button]

    Vibriance Super C Vitamin C facial Serum is a high-potency, multi-tasking serum that hydrates, brightens, and nourishes all skin types— even sensitive skin. Made with a concentrated base from evaporated lemons, it absorbs quickly with a unique active lock delivery system for lasting moisture and visible radiance.

    Fièra Vitamin C Serum 

    [su_button url=”https://amzn.to/4kuWqKC” target=”blank” style=”3d” background=”#1b2b43″ size=”5″ center=”yes” radius=”0″ icon=”icon: shopping-cart” bold=”yes”]SHOP NOW [/su_button]

    Fièra Vitamin C Serum is a powerful, plant-based formula designed for mature skin 40+. Infused with vitamin C, stem cells, Hyaluronic Acid, and Caribbean Orange Oil, it brightens dark spots, smooth wrinkles, hydrates deeply, and evens tone without greasiness. Free of parabens and GMOs, this serum delivers visible anti-aging results and a radiant, youthful glow trusted by millions worldwide.

    Vitamin C+E Serum

    [su_button url=”https://amzn.to/40D3wW9″ target=”blank” style=”3d” background=”#1b2b43″ size=”5″ center=”yes” radius=”0″ icon=”icon: shopping-cart” bold=”yes”]SHOP NOW [/su_button]

    Vitamin C+E & Ferulic Acid Serum is a potent antioxidant formula with 15% pure Vitamin C,Vitamin E,and 0.5% Ferulic Acid to protect against free radicals, brighten skin, and reduce fine lines and dark spots. While a low-acidity, pure L-Ascorbic Acid base, it absorbs deeply for lasting results while staying gentle and safe for all skin types.

    Super Vitamin C Serum

    [su_button url=”https://amzn.to/4nxL1fA” target=”blank” style=”3d” background=”#1b2b43″ size=”5″ center=”yes” radius=”0″ icon=”icon: shopping-cart” bold=”yes”]SHOP NOW [/su_button]

    Vitamin C serum is specially formulated for women over 50,60, and 70 to target wrinkles, dark spots, and loss of firmness. Enriched with Vitamin C, Niacinamide, Hyaluronic Acid, peptides, and Bakuchiol, it brightens, hydrates, and lifts aging skin. 

     5th & Glow Glowic Anti-Aging Serum
       

    [su_button url=”https://amzn.to/44fVMM8″ target=”blank” style=”3d” background=”#1b2b43″ size=”5″ center=”yes” radius=”0″ icon=”icon: shopping-cart” bold=”yes”]SHOP NOW [/su_button]

    5th & Glow Glowic Anti-Aging serum is fast- absorbing antioxidant treatment that brightens, firms, and protects your skin. Packed with Vitamin C, Vitamin E, ferulic Acid, and Tocopherol, it helps reduce fine lines, wrinkles, and age spots while defending against environmental damage. Use daily for a smooth, radiant complexion you will love.

    Eight Saints Vitamin C Serum

    [su_button url=”https://amzn.to/4eBXDyp” target=”blank” style=”3d” background=”#1b2b43″ size=”5″ center=”yes” radius=”0″ icon=”icon: shopping-cart” bold=”yes”]SHOP NOW [/su_button]

    Eight Saints Vitamin C Serum features a potent, stable form of Vitamin C(SAP) to brighten skin, reduce redness, and support collagen production. Made with natural, organic ingredients like Vitamin E, Hyaluronic Acid, and Aloe, this fragrance- free, cruelty-free serum is safe for all skin types and helps prevent acne while promoting an even, healthy glow.

    U Beauty Resurfacing Compound Serum

    [su_button url=”https://amzn.to/407A36x” target=”blank” style=”3d” background=”#1b2b43″ size=”5″ center=”yes” radius=”0″ icon=”icon: shopping-cart” bold=”yes”]SHOP NOW [/su_button]

    U Beauty Resurfacing Compound is an innovative 8-in-1 serum that replaces multiple products in one step.Powered by SIREN capsule Technology, it combines retinol, hyaluronic acid, peptides, vitamins C and E, and AHAs to hydrate,smooth fine lines, even skin tone,and renew your complexion for a youthful, radiant glow.

    Eva Naturals Vitamin C Serum

    [su_button url=”https://amzn.to/44zc5CK” target=”blank” style=”3d” background=”#1b2b43″ size=”5″ center=”yes” radius=”0″ icon=”icon: shopping-cart” bold=”yes”]SHOP NOW [/su_button]

    Eva Naturals Vitamin C Serum combines hyaluronic acid, niacinamide, retinol, and salicylic acid to hydrate, smooth wrinkles, fight acne, and fade dark spots. Packed with antioxidants and plant-based ingredients like aloe, it brightens and evens skin tone for a clear, radiant complexion. This serum is perfect for all skin types.

    Achieving glowing, healthy skin doesn’t have to cost a fortune. With so many effective, dermatologist-loved serums available for under $100, you can target wrinkles, dullness, dark spots, and uneven texture without breaking your budget. Whether you prefer the brightening power of Vitamin C, the plumping hydration of hyaluronic acid, or the smoothing benefits of retinol, there’s no affordable serum here to match your unique skin needs.

    So, you can explore Top picks, and discover how a simple step in your skincare routine can transform your complexion. Try one today and get ready to glow with confidence!

    Have you tried any of these serums or have your own favourites? Share your experience in the comments below— I would love to hear your thoughts!

  • Build a Capsule Wardrobe You’ll Love – Discover Your Style With This Quiz

    Build a Capsule Wardrobe You’ll Love – Discover Your Style With This Quiz

    I will be honest—when I first heard the term capsule wardrobe, it sounded like something only fashion editors or minimalists with perfect white closets could pull off. But the truth is, you don’t need a Vogue budget or a sterile aesthetic to create a closet that works for you.

    A capsule wardrobe is just a collection of clothes you love that mix and match effortlessly, so you spend less time stressing over outfits and more time actually living.

    If you have ever stared at your closet, feeling like you have nothing to wear, you are in the right place. Let’s walk step by step through building a capsule wardrobe that feels personal, practical, and most importantly— doable.

    What Is a Capsule Wardrobe, Really?

    A Capsule wardrobe helps you simplify your closet by keeping only essential, adaptable pieces that fit your lifestyle.

    Think 30-40 pieces max, including tops, bottoms, dresses, layers, and shoes.

    The idea is not to make you feel restricted. It’s to help you clear out the clutters so you can get dressed faster and feel confident in what you wear every single day.

    The goal is not to deprive yourself— it is to clear out the clutter so getting dressed feels effortless.

    Watch this video to learn how to build a capsule wardrobe that truly fits you— and discover what happens if you don’t have one.

    1.Begin By Clearing Out Your Closet

    This Part is not always fun, but it’s really important.

    Take everything out of your closet. Every top, every scarf, every pair of jeans in your closet.

     Pick up each thing and ask yourself.

    • Do I actually wear this?
    • Do I feel nice when I wear it?
    • Does it fit my life right now?

    If you are in doubt, you probably don’t need to keep it.

    Make three piles:

    • Keep (It’s your favorite and you wear it many times)
    • Maybe ( You will try it on later and decide)
    • Donate or Sell ( someone else can use it)

    Trust me — getting rid of the extra stuff feels like a big, relaxing breath.

    2.Define Your Personal Style

    If you are not sure how to define your personal style, take this quick style quiz to discover what suits you best.

    Here is where a lot of guides go wrong. They will tell you to copy a Pinterest aesthetic or buy a list of “ must- have” pieces. But if you hate blazers or never wear heels, why force it?

    Take a moment to think about:

    • The outfits you feel most confident in 
    • Colors you naturally gravitate toward
    • Your day-to-day needs

    Make sure your capsule wardrobe suits you, not just what’s trendy on social media.

    See this video about learning to trust your intuition in defining your personal style.

    3.Pick Colors That Mix and Match Easily

    Most capsule wardrobe sticks to neutral colors—black, white, beige, navy so everything coordinates. But you don’t have to go monotone if that feels boring.

    Pick a few base colors you love, plus 1-2 accent shades for variety. For example:

    Base: Black ,gray, white

    Accents: Olive green, blush pink

    This makes mixing and matching so much easier.

    Watch this step-by-step video  to design a color palette that reflects your style:


    View this post on Instagram


    A post shared by SALLY MACKINNON – Melbourne Stylist (@styledbysally)

    4.Build Around Key Categories

    You can break your capsule wardrobe into simple groups:

    Tops: Tees, blouses, sweaters

    Bottoms: Jeans, trousers, skirts

    Layers: Jackets, cardigans

    Dresses/Jumpsuits: optional but great for one-step outfits

    Shoes: A few pairs you will rotate often

    Try to stick to around 30-40 pieces altogether. Trust me, it is more than enough.

    5. Prioritize Quality Over Quantity 

    You don’t need to spend thousands, but it helps to invest in well-made staples you will wear on repeat.

    Look for pieces that:

    • Hold their shape after washing
    • Feel good on your skin
    • Can handle real-life wear

    I have learned that when you buy better quality, you actually keep and wear it much longer.

    6. Plan for Seasons and Special Occasions

    If you live somewhere with extreme seasons, you might have a separate capsule for summer and winter. That’s normal.

    Also, keep a small section for special events— interviews, weddings, holidays— so you are not rushing at the last minute.

    7. Make Your Wardrobe Personal

    Capsule wardrobes are not about perfection. You will probably tweak yours as you go, and that’s okay.

    If you discover a gap — like needing a better pair of jeans—add it thoughtfully. If you realize you never wear something, let it go guilt-free.

    This is about reducing stress, not creating more rules.

    Why You Will Love Living With Less

    Here is what I noticed once I committed to a capsule wardrobe

    • Less decision fatigue: Getting dressed is quick and easy.
    • More Confidence: Everything fits and feels good.
    • More space and peace: No more piles of stuff I never touch.

    So, a capsule wardrobe is one of the best ways to upgrade your everyday life.

    I made a quick quiz to help you get clarity on your style before you declutter.
    Tap the button below to see which Capsule Wardrobe Personality you have!

    Ready To Try It?

    I would love to hear—have you tried a capsule wardrobe before, or are you thinking about it now? 

    What’s your biggest challenge when it comes to simplifying your closet?

    Drop a comment below and let’s share ideas—I am here to help you build a wardrobe you will actually love.

  • What Makeup Looks Best On Me? Take The Quiz and Find Out

    What Makeup Looks Best On Me? Take The Quiz and Find Out

    I know the feeling— standing in front of the mirror, brushes in hand, and wondering, Am I really wearing the right makeup for me?

    You are not alone. We all have days when our foundation feels too heavy, or our lipstick just doesn’t feel us.

    The truth is, the best makeup look is not about trends or what everyone else is doing. It is about what makes you feel like the most confident version of yourself.

    So, Let’s explore how to figure that out together.

    Why Your Makeup Should Fit You, Not Just the Trend

    I see so many people trying to copy whatever’s popular on Social media. But here’s something I have learned from years in beauty.

    The same smoky eye that looks amazing on your friend or any celebrities might not flatter your eye or skin tone.

    Studies have found that — over 60% of  women feel more confident when their makeup complements their natural features rather than hides them.

    That’s why knowing your undertone, face shape, and personal style matters way more than following every viral trend.

    The 3 Makeup Styles You Should Know

    Before you take the quiz, here are the three most popular makeup styles that people gravitate towards:

    1. Natural Glow

    This is for you if you love looking fresh and effortless. Think sheer foundation, soft blush, and a swipe of tinted lip balm. It is perfect for workdays and casual weekends.

    1. Soft Glam

    If you like a bot of polish but don’t want to go full drama, soft glam is a sweet spot. You will see neutral eyeshadows, a subtle contour, and a satin lipstick. It feels put-together without trying too hard.

    1. Bold Statement

    This is where you shine if you love to stand out. Vibrant lip colors, graphic eyeliner,. and full lashes are your go-to tools. You don’t mind being the centre of attention— and you wear it beautifully.

    If you are looking for even more inspiration, check out These 13 easy makeup ideas from L’Oréal Paris— they are perfect for busy mornings when you still want to look polished.

    How To Find The Best Makeup Look For You 

    I always tell people to start by asking themselves these questions:

    How much  time do I realistically have each day to do my makeup?

    What features do I love most about my face?

    Do I want my makeup to look natural, polished, or dramatic?

    When you get honest about your routine and personality, the right look becomes obvious.

    For example, If you only have a few minutes to get ready, a natural glow keeps things simple and fresh. But if you enjoy expressing yourself with color, bold makeup is the way to go.

    Want even more help finding your perfect makeup look? Watch this video: How to Find your Signature Makeup look in just 4 steps. So You will get easy-to-follow tips and see how I create my signature makeup look from start to finish.

    Are You Ready To Find Your Perfect Makeup Look?

    I would love to hear what you discovered — did the quiz match how you already see your makeup look, or did it surprise you?

    No matter where you land: remember: makeup is all about having fun and feeling confident in your own skin. There is no right or wrong way to express who you are.

    If you haven’t tried the Quiz yet, now’s your chance to find out what look truly fits you best.

    So Take the Quiz and see which makeup style feels most like you.

    Need help getting started? Check out my beginner makeup tutorial for easy, step-by-step tips you can follow today to feel confident and look your best.

    Then comeback and drop a comment below— I would love to hear your results and what inspired you to explore something new!


  • The Ultimate Korean Glass Skin Routine—What Your Skin Actually Needs

    The Ultimate Korean Glass Skin Routine—What Your Skin Actually Needs

    When people say “ Glass Skin”, they  don’t actually mean your skin should look like a mirror. It just means  that your skin is super clear, even-toned, hydrated,  smooth and radiant.

    As someone who is struggling with dull, uneven skin, I have always been fascinated by the concept of “ glass skin” , that coveted, luminous complexion that Koreans have perfected. But what exactly is glass skin, and how can you achieve it? 

    When I first started chasing the glass skin glow, I made every mistake—too many products, wrong ingredients, unrealistic expectations. I thought if I used more products, my skin would get better faster. But the more I layered on , the worse my skin got breakouts, dryness and zero glow. That’s when I realized getting glass skin is not about using more, it’s about using the right products the right way.

    Let’s explore the truth behind glass skin — the popular K-beauty trends that’s more about healthy skin than high-maintenance routines.

    What is Glass Skin? The Glow That Starts From Within

    So, what is glass skin? Imagine having a complexion that’s so smooth, radiant, and even-toned that it looks like, well, glass! It is not just about aesthetics; glass skin is also a reflection of overall skin health. When your skin is healthy, it glows from within, and that’s exactly what we are aiming for

    Let’s get real— achieving glass skin is not using the right products, it’s also about adopting a holistic approach to skincare.

     Understand Your Skin Type

    Before you can start working towards glass skin, you need to understand your skin type. Are your skin oily, dry, combination or sensitive? Knowing your skin type will help you choose the right products and tailor your  skincare routine accordingly.

    Glass Skin Routine Step-by-Step

    • Step 1 : Start With Gentle Cleanser 

    You want a low-pH, gentle cleanser that does not strip your skin. Over-cleansing messes with your barrier, which can actually make your skin dull or irritated.

    You should try double cleansing at night if you wear sunscreen or makeup. First an oil-based cleanser, then a water- based one.

    • Step2: Exfoliate — But Don’t Overdo It

    One of the biggest mistakes I made  early on was exfoliating daily.

    Glass skin needs a smooth surface, yes, but too much exfoliation causes microtears and irritation. Now I exfoliate 2-3 times a week—usually with a gentle AHA toner or an enzyme- based peel.

    • Step 3 : Layer Your Hydration

    If there is one rule in skincare, it’s this: hydrate like your life depends on it.

    I  build up my skincare one layer at a time— toner, essence, serum and then moisturizer.

    But you don’t need every step, just the ones that work best for you.

    Look for ingredients like:

    • Hyaluronic acid
    • Glycerin
    • Snail mucin
    • Panthenol


    • Step4: Use A lightweight Moisturizer

    Even if your skin is oily. Don’t skip moisturizer.

    The right moisturizer seals everything in and keeps that hydrated glow intact. Go for something lightweight, gel based, or barrier-strengthening if your skin is sensitive or flaky.

    • Step 5 : Seal It With SPF

    Nothing dulls the skin like sun damage.

    I wear SPF 30+ Sunscreen every single day whether it is a rainy or a sunny day. Think of it as your invisible shield. Korean sunscreens are great for that no-white-cast, non-greasy finish and you also need it if you are inside and near windows or screens.

    Want to see exactly how these steps in real life? Check out this You Tube video where this video break down each step of Korean Glass Skin routine with product tips, application hacks, and what really worked for you!

    What Worked For Me and Might Work For You

    I started seeing results when I:

    • Switched to fragrance-free products
    • Used hydrating toners instead of drying astringents
    • Cut out physical scrubs
    • Stayed Consistent

    You don’t have to be perfect. You just have to be consistent and follow the skincare routine.

    Even celebrities are embracing the power of a proper Korean Glass Skin Facial. Actress Anjali Tatrari recently visited Mi Young one of the go-to spots for authentic Korean Skincare and the results speak for themselves. Her radiant skin proves that the right routine works. Watch the Instagram video to see her results for yourself!

    Final Thoughts: It’s Not Just About Skin Care

    Glass skin is not about how you look. It is about how you feel in your skin

    That Glow? It is a combo of skincare, hydration, good sleep, and less stress and your lifestyle. When you started taking care of yourself — not just your face— that’s when things really changed.

    Let’s Talk — What’s Your Skin Dealing With These Days?

    I would love to hear what your skin is dealing with—dry patches, breakouts, or just feeling Off? So You are not alone. Share your skincare story in the comments.

  • Microneedling Benefits: What It Did For My Skin, and What You Should Know First

    Microneedling Benefits: What It Did For My Skin, and What You Should Know First

    If you are tired of feeling self-conscious about your skin, you are not alone. I also struggled with issues that seemed impossible to overcome. But everything changed when I tried Microneedling. This game-changing treatment helped me say goodbye to acne scars and hello to radiant, healthy looking skin.

    So, If you are curious about what microneedling actually does, how it works, and whether it is worth the hype, you are in the right place. I am breaking down the benefits, what to expect, how it changed my skin— so you can make a confident decision for your own skin.

    Microneedling: What You  Should Know Before Trying It

    Microneedling might sound intimidating — a device with tiny needles creating micro-injuries in your skin? But trust me, it is  not as scary as it sounds. In fact, it is a clever way to trigger your body’s natural healing process, boosting collagen production and helping to deal with acne scars, fine lines, and uneven skin tone. By stimulating your skin’s natural response, microneedling encourages collagen production, Collagen is the protein that keeps your skin firm, smooth and youthful.

    So , don’t let the idea of needles scare you off – microneedling is a safe and effective way to refresh your skin and achieve the glow you have been looking for.

     The Skin Benefits Of Microneedling

    Here is what I  personally noticed and what research supports— when it comes to the real, visible benefits of microneedling:

    • Reduces acne scars

    Microneedling can help to break up scar tissue and promote collagen production, reducing the appearance of acne scars. It did not erase them overnight , but after 3 sessions , my skin looked smoother and more even.

    • Boosts Collagen Production 

    By stimulating collagen production, microneedling can help to plump up skin, reducing the appearance of fine lines and wrinkles.

    • Reduces Fine lines and Wrinkles

    By plumping up skin and refining skin texture. As collagen levels increase, skin becomes smoother, firmer, and more radiant, diminishing the appearance of fine lines and wrinkles.

    • Fades Hyperpigmentation

    This treatment helps to break up melanin and promote cell turnover. Reducing the appearance of hyperpigmentation and resulting in a more even skin tone.

    Does Microneedling Hurt? Here’s the Truth

    Let me be real—Microneedling treatment is not pain free, but it is not unbearable either. It feels like sandpaper brushing over your skin, with warm tingling and that helps a lot. Once they began, it felt like a vibrating pen with tiny pricks moving across my skin, my cheeks and jawline. But on the forehead and around the nose? A little sharper, but still bearable.

    The whole process is about 20-30 minutes. My face looked red right after— like I had a sunburn but it didn’t hurt. The next day, the redness had calmed down, and I was left with some light dryness.

    So, It’s not a relaxing spa experience, but it is not painful either. If you are prepared and go to a skilled professional, the process is easy to handle— and the benefits are worth any short-term discomfort.

    Want to see what Microneedling looks like one month later? This Instagram post offers an honest, helpful recap of the one-month update — covering the process, recovery experience, and why a ‘low and slow’ approach delivered better results than higher-risk treatments.

    How Many Sessions Do You Need?

    If you are targeting acne scars or wrinkles, 3 to 6 sessions are scheduled 4-6 weeks. Deeper scars or more severe skin issues may need more sessions.

    Here is rough guide based on skin concerns:

    Skin Concern                                                                               Recommended Sessions

    • Acne Scars                                                                                        4 to 6 sessions 
    • Fine Lines/ Wrinkles                                                                      3 to 4 sessions
    • Large Pores and Texture                                                                 3 to 5 sessions                             
    • Stretch Marks                                                                                    6 to 8 sessions
    • Overall Glow                                                                                    1 to 3 sessions per year

    But You should always Consult a Certified dermatologist or skin expert before starting it. They all assess your skin and recommend the ideal number of sessions based on your condition and goals.

    Is Microneedling Safe?

    Microneedling Treatment is safe when it is done by a trained professional. But yes, there can be side effects like redness, swelling and in some rare cases, infection especially when it is done at home without proper hygiene.

    Want a real look what microneedling feels like? Check out this You Tube video that  shows a complete microneedling facial experience, from start to finish.

    Pro Tips From My Journey 

    • Don’t wear makeup for 24 hours after your session
    • Skip activities like retinol or acids for 3-5 days post treatment.
    • Avoid touching your face because your hands carry bacteria and your skin is in healing mode.
    • Book your session when you have 2-3 days to chill.

    Final Thoughts : Is It Worth It?

    For me, YES. I won’t lie and say microneedling gave me perfect skin, but it gave me results that I actually showed up in the mirror. My scars faded, my skin texture improved, and my confidence shot up.

    If you are struggling with acne, scars , dullness or just want to give your skin boost , this Microneedling treatment is  definitely  worth a try.

    If you are still unsure about what microneedling really does, this video breaks down the surprising truth behind the treatment— what works, what doesn’t, and what you should know before trying it yourself.

    So Have you tried  microneedling or considered it? What skin concern are you hoping to treat? Let’s talk—drop your thoughts in the comments. I would love to hear your experience and your thoughts.